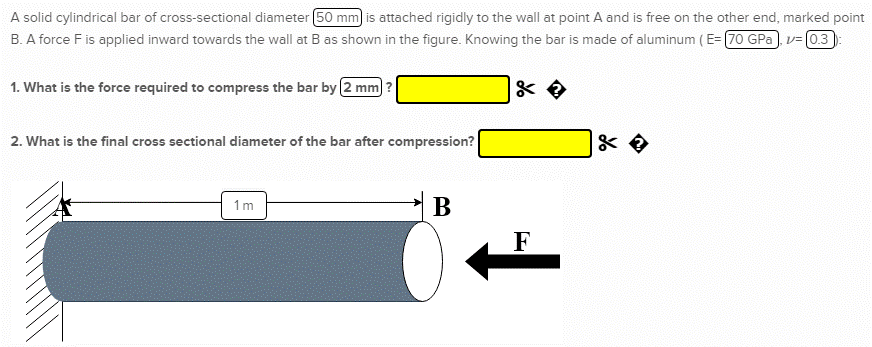
The quantities in the problem can be clicked to select them. These are boxes that highlight when hovered over, and appear in both problem texts as well as the figures.
Welcome to the tutorial for the DEFORMS problem solving system!
We'll guide you through the basic steps on how to use this system to solve equations, submit answers, and get feedback.
Important: Please use the Google Chrome browser to use this system for the best experience. Otherwise, the user interface may not appear correctly.
Different parts of the system
There are three main parts of the system: the prose, the work area, the notifications (Click on images to go to tutorials):
Additionally, to jump to instructions on how to solve problems, click on the sections for:
The problem prose
The problem prose contains the text of the problem and values that can be added.

The yellow solution boxes next to each sub-part question can be clicked on to add quantities computed from the system. The "✂" icon can be clicked to clear the boxes, and "�" for a quick in-system help.

Sometimes, solution boxes may allow entry from a list of options. See the instructions for such exercises.

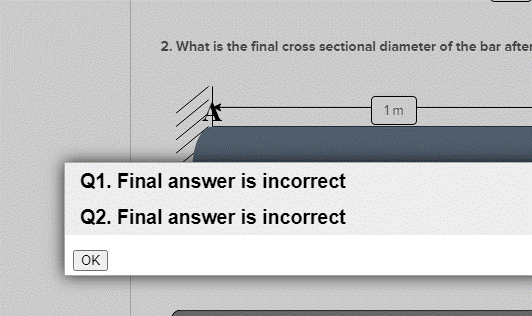
Once solution boxes have been populated, click on "Check Answer" to submit the answers and get feedback.

Introducing the workspace and the palette
The workarea is where all calculations are carried out. Systems of equations are built here, and populated with quantities from the prose.
At the end, solutions computed are put back into the solution boxes for each question, which are then subsequently evaluated.
There are two parts here: The workspace and the equation palette.
Workspace 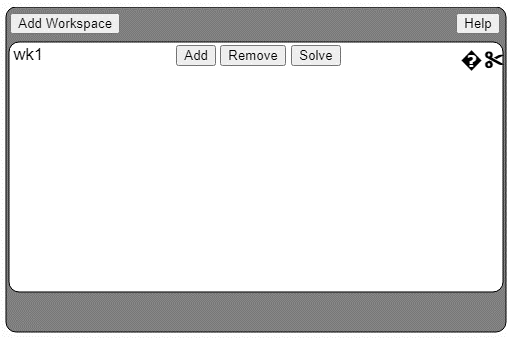 |
Palette 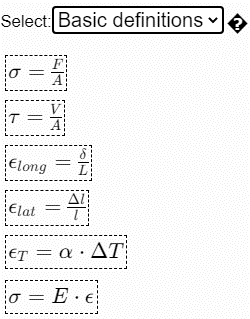
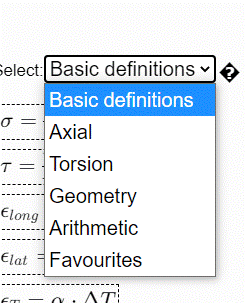
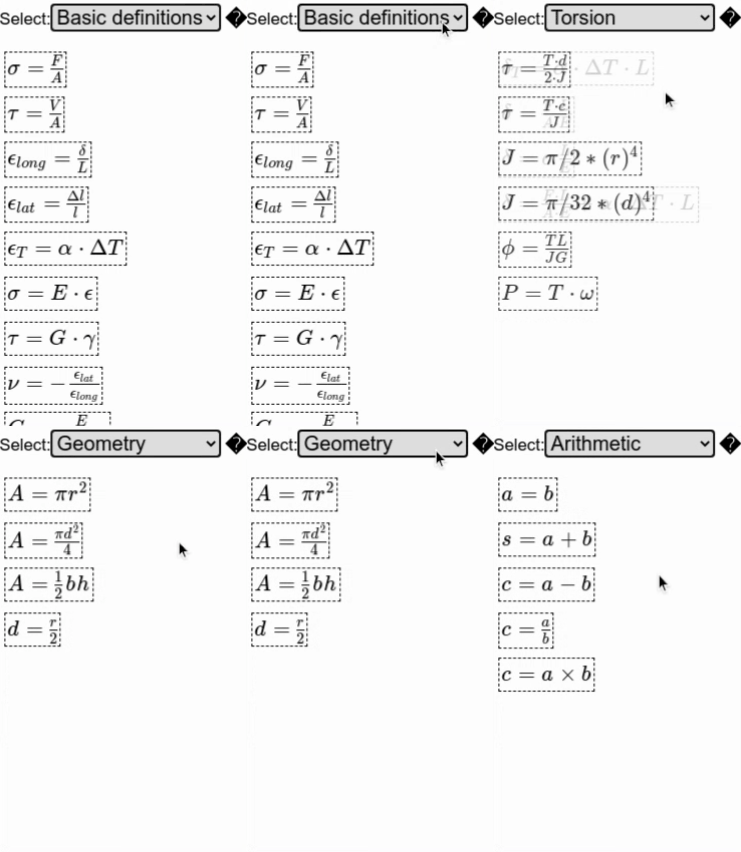 |
Equations are added by going to the appropriate equation palette page, clicking on the equation to be added to select it (highlighted), and then clicking on the button for the corresponding workspace to add it in.
- For creating arithmetic combinations of values or creating your own equations, use the Arithmetic page.
- To access equations frequently/recently used, go to the Favourites page.

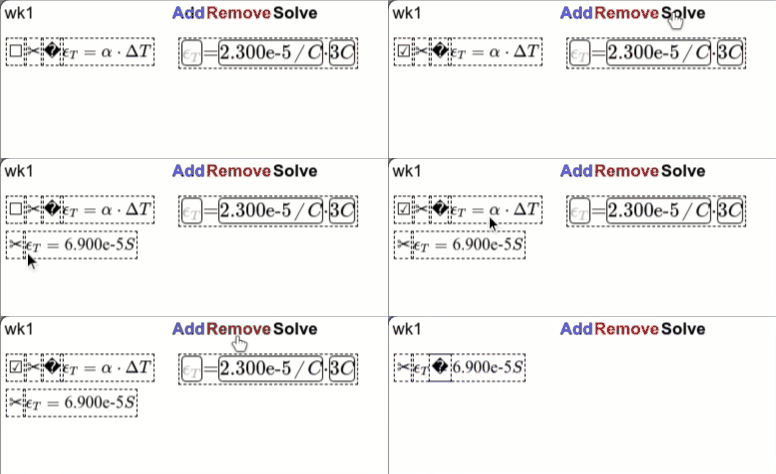
Equations can be removed:
- Individually by clicking on the "✂" icon for the equations
- In groups by checking the checkbox "☐" to select it ("☑") for each equation to be deleted, and then clicking the for the workspace.
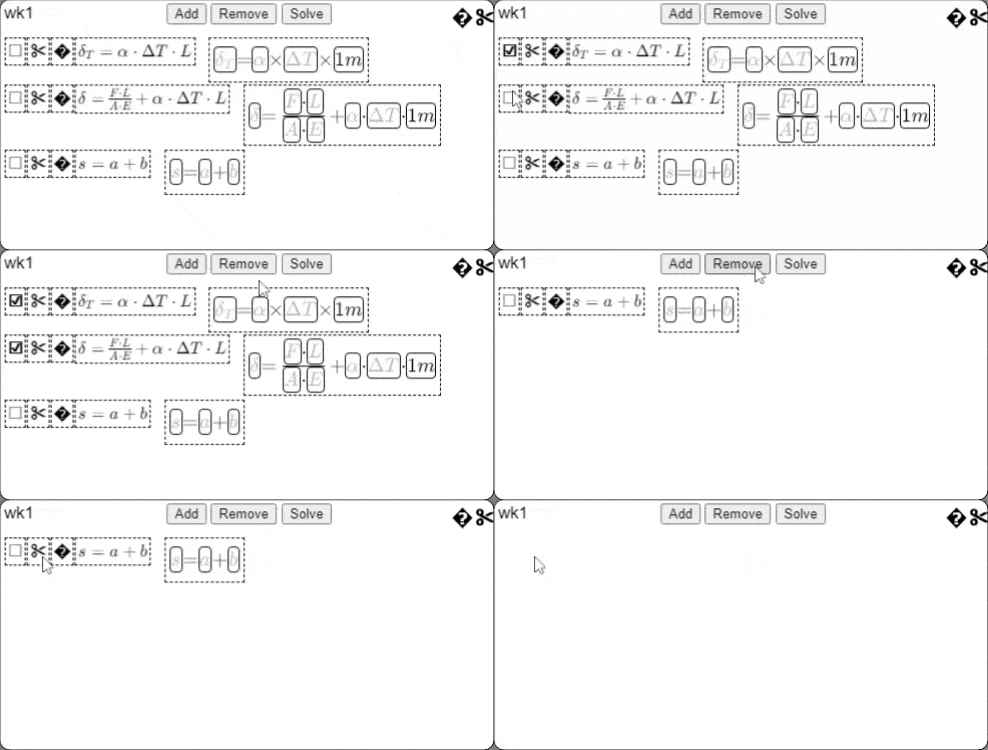
Workspaces are added one below the other by clicking on the . They can be deleted in any order by clicking on the "✂" icon in the corner for the workspace.
Note: Deleting a workspace deletes all solutions and equations in the workspace, so this makes it ideal for creating a clean slate for a fresh start!
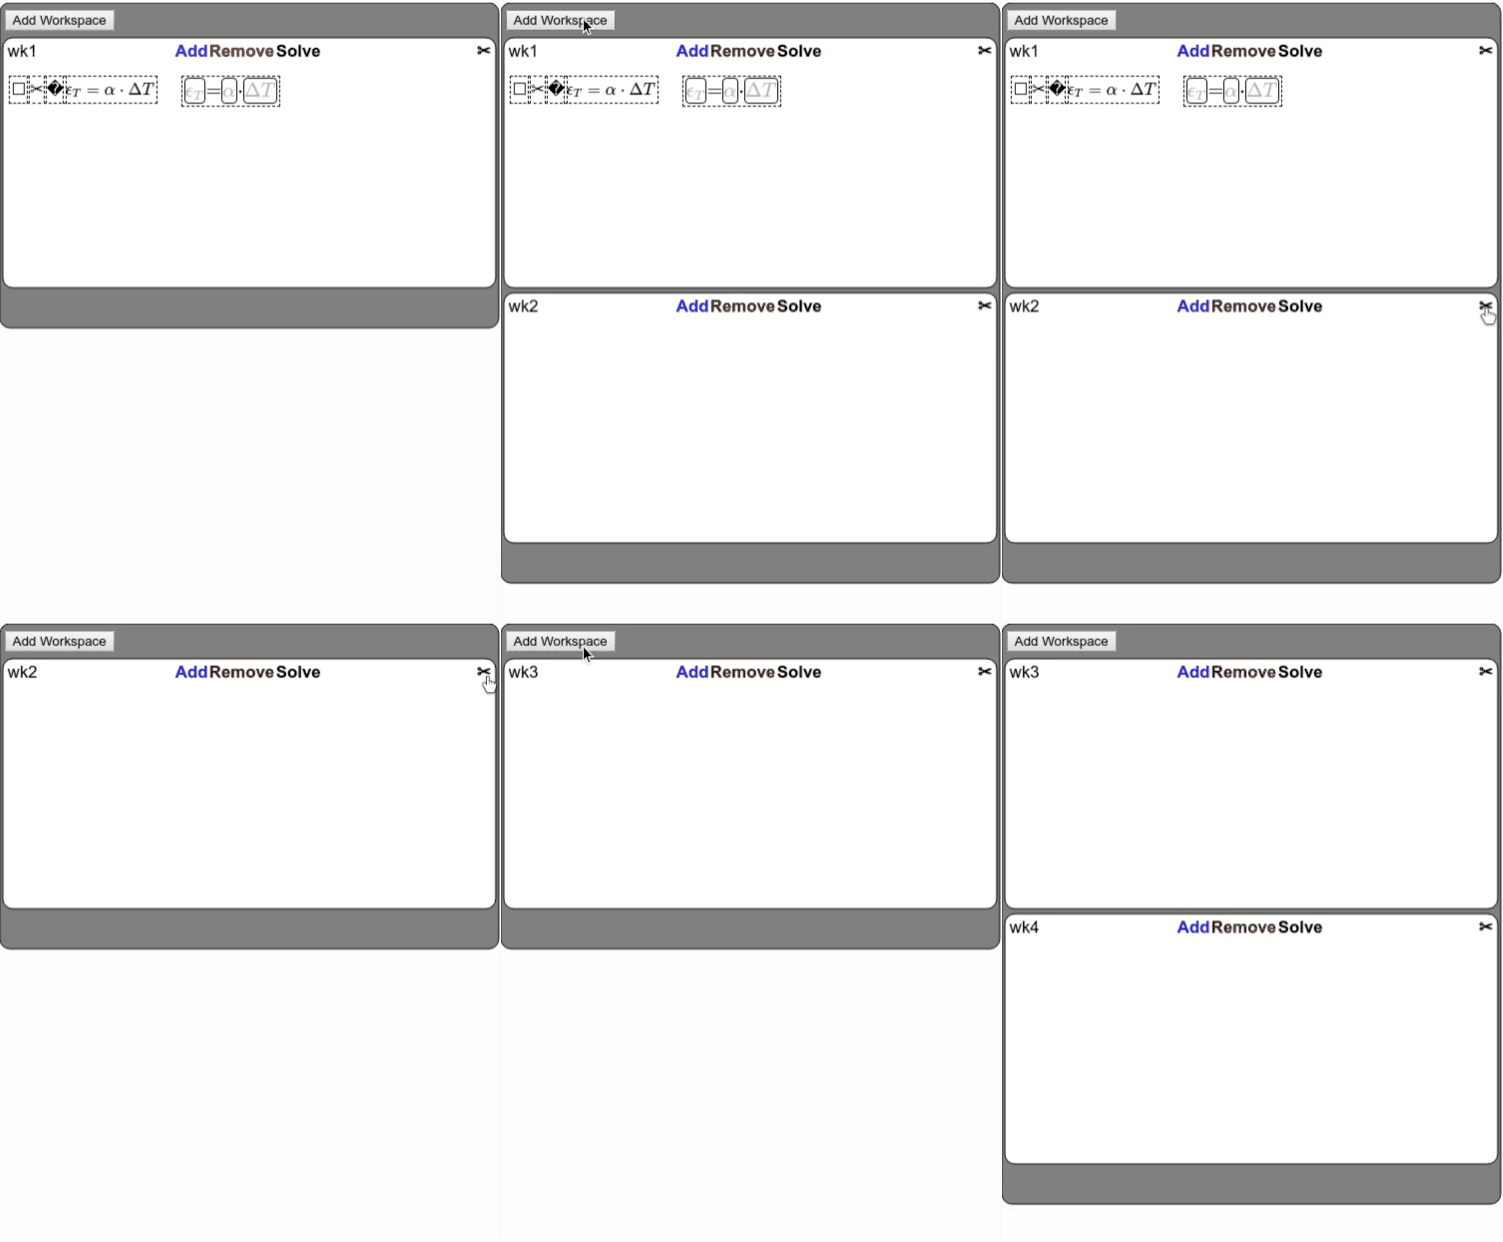
Working with equations
Equations form the main workhorse of this system. Any kind of calculations or verifications with quantities starts with equation objects added from the palette to the workspace. Each equation has a clickable template with greyed out boxes on the right. These boxes represent variables to which anything can be assigned (quantities, variable associations, etc.)
Values can be added to an equation's variables by clicking on a quantity in the prose (or figure) to select it and then clicking on the box in the equation where it should appear. Note: The sign of the value added can also be negated by clicking to bring up the menu and selecting "multiply by -1".


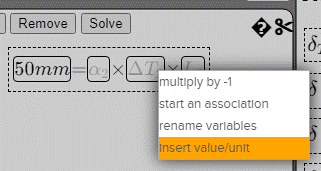
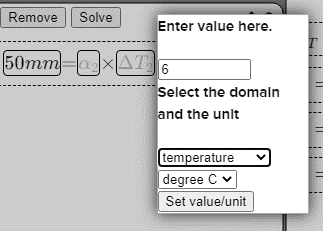
Alternatively, one could insert quantities manually into boxes as well. This is accessed by clicking on an empty box to bring up the menu, then clicking on the "insert" option to add the magnitude and quantity. This is often useful for using the system as a calculator, when used with physical quantities. Note: To work with plain numbers that aren't physical quantities (or quantities like angles and strain), select "dimensionless" for the domain and unit.
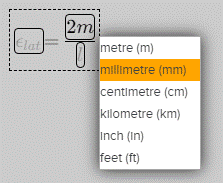
Once a quantity is added, its unit can be changed by clicking on the green-highlighted prompt for unit of the entered quantity. This brings up a list of units in the same domain as the unit of this quantity.

To solve 1 equation or a system of n>1 equations - once the system is set up to show the number of knowns and unknowns, we select ("☑") the equations by clicking on the checkbox,
and then click on for the corresponding workspace the equations appear in.
Note:
- Only equations in one workspace can be solved at a time.
- To solve an equation in one variable, simply leave one (or corresponding elements in case of duplication) elements in the equation blank. Note: The sign associated with a single unknown (empty variable box) can also be negated by clicking to bring up the menu and selecting "multiply by -1".
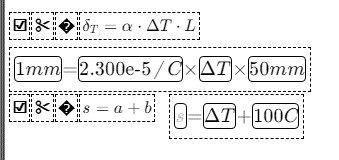
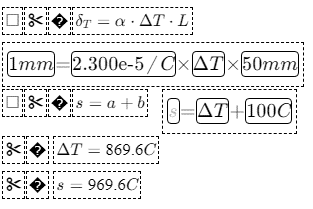
Solving equations creates solution boxes as shown. These can be selected to be entered into other equations just like quantities from the prose. To submit the value calculated as the answer for a question, click on it to select it, and then click on the submission box for the question to enter it. Note: Double clicking the box negates the magnitude of the value in the solution box.


[back to top]
Working with variable associations
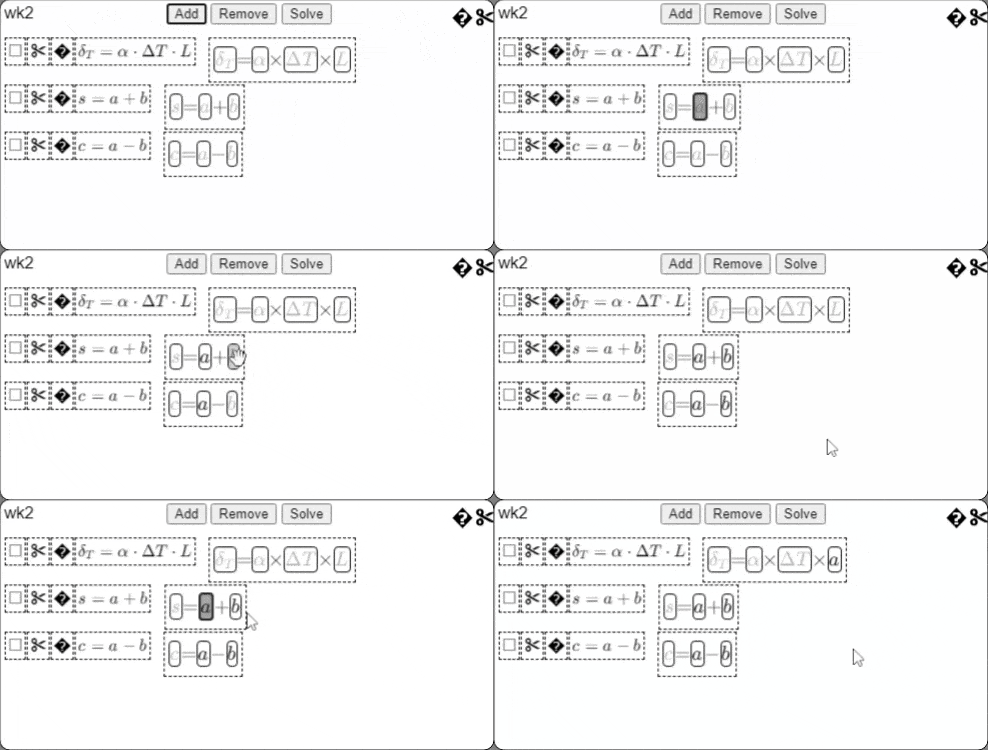
- To create a variable association among two terms in two equations, click on any one of the empty boxes for the terms to bring up the menu, and select "start association". This highlights the start of the association. Then, click on the variable box for the second term, which will then bolden the text for the two boxes, indicating the variables have been associated.
- To create a variable association in n>2 terms, first create an association with any two of the n terms. Then, click on either of the associated terms to bring up the menu and select "add new to association". Then, repeat the process as above to select another target variable to add to the association.
Note: The sign associated with an unknown can also be negated by clicking to bring up the menu and selecting "multiply by -1".
Customising association names/equations for readability
To enhance readability for students and to facilitate keeping track of contexts for different problem setups, we provide some features to customize the names of unknowns and associations and equations.
For an unknown that appears in only one equation (i.e. an empty box), to rename this unknown, simple click on it to bring up its menu, and select "rename variables", followed by entering a variable name and/or a subscript for the variable.
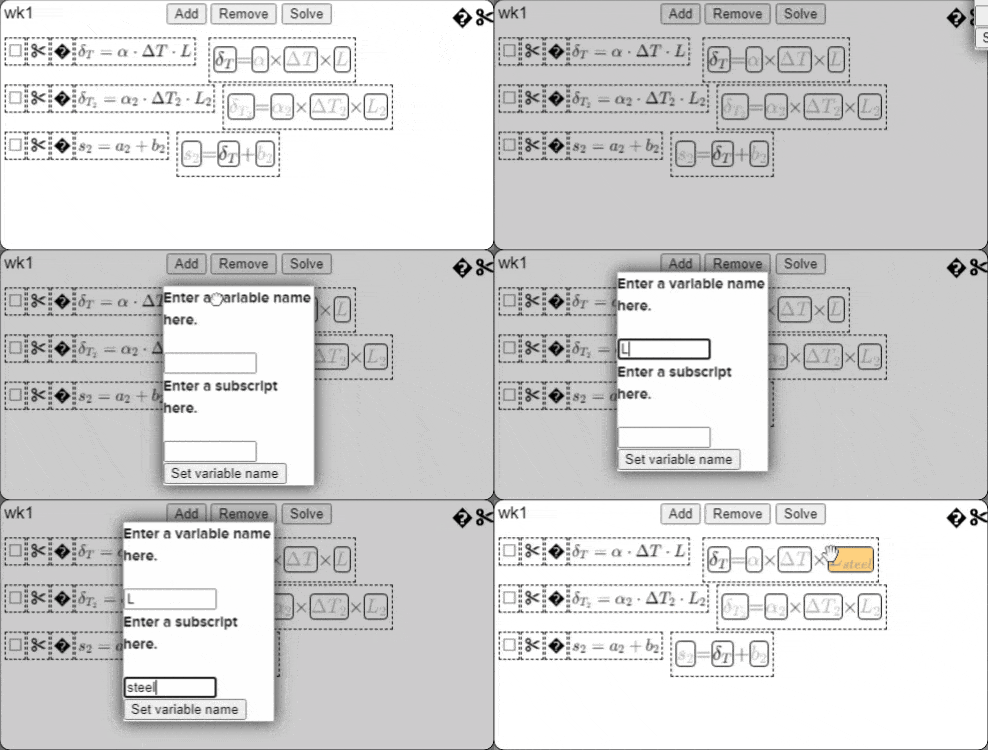
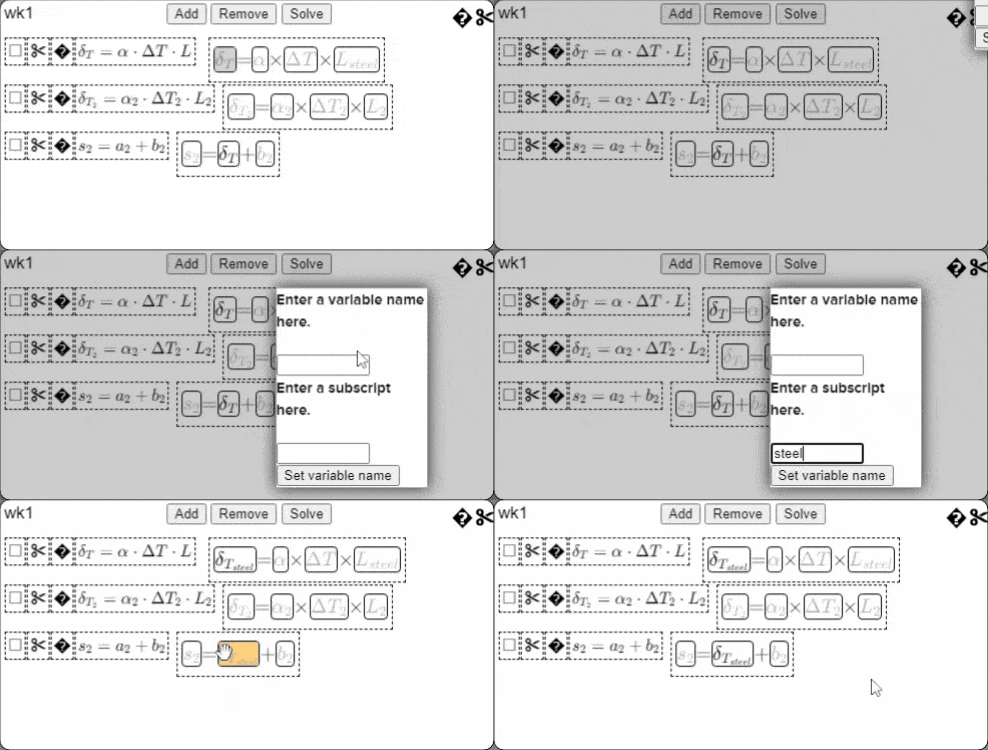
For an n-way variable association, to rename this unknown variable, simple click on it to bring up its menu, and select "rename association", followed by entering a variable name and/or a subscript for the variable.
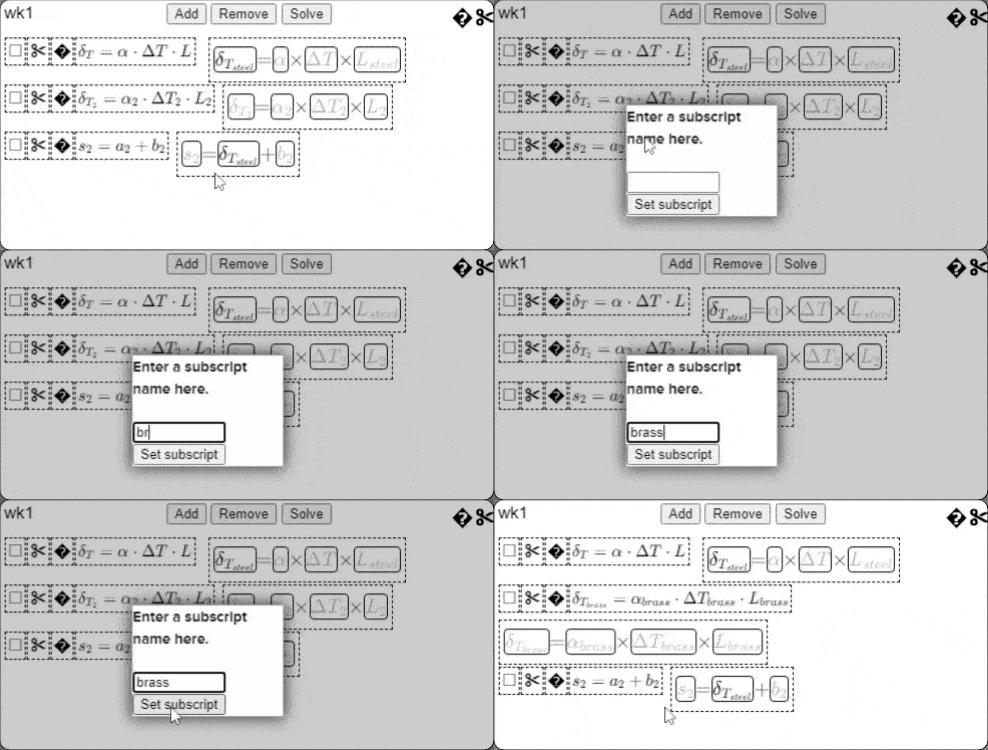
To add a subscript to all the variables in an equation to indicate the specific context that equation belongs to (eg: different materials, numerical index, etc.), click on the text template for the equation to bring up the dialog box to enter a subscript for the equation.
Note: In all of these cases, to reset the variable name back to original or to remove subscripts, simply click "Set" etc. without filling in the blanks.
[back to top]Receiving feedback
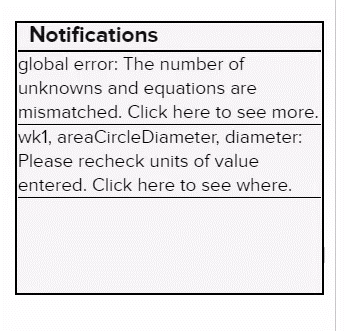
The notifications panel on the right side shows errors for anything that may have happened with your system. Click on the errors to show more details about them. In some cases, clicking on the boxes will also show where in the equations an error has occurred.
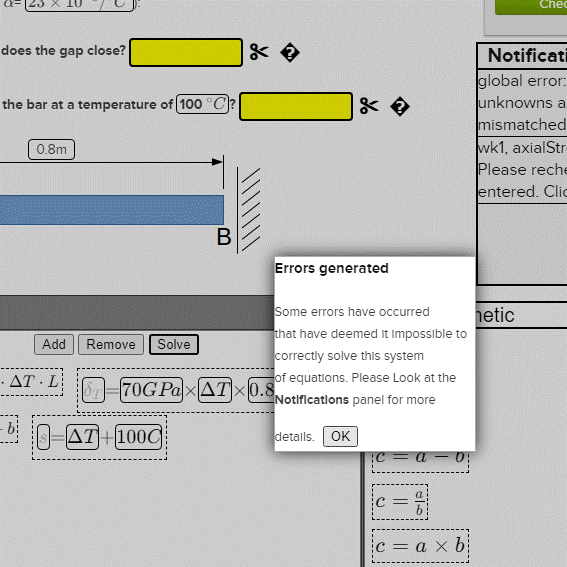
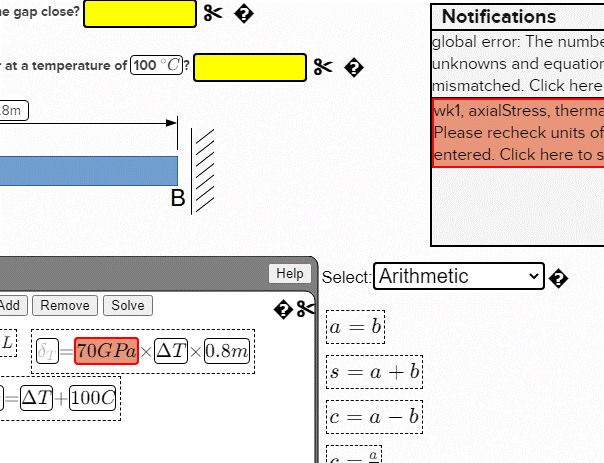
These are some of the errors you might encounter:
Number of unknowns is not equal to the number of known quantities. (shows up as a global error)

Quantities with wrong units have been entered in the wrong place in an equation. Alternatively, an entire equation might be inconsistent because of the associations created or quantities entered. Click on these errors to see where the error may have occurred.

(Not an error, but a warning) Inconsistent units were used in the system which were implicitly converted by the solver prior to computation.

Additional help
For any additional help during using the system, click on the help symbols (�) located throughout the system to bring up a mini-tutorial for the specific components.
[back to top]